How to Install Cisco Packet Tracer 8.2.1 on Windows 11 & 10
I will provide a detailed explanation of the installation process. I will also cover the system requirements and get the simulator software.
If you are a networking student preparing for exams, Packet Tracer is for you! It is suitable for you not only for exams but also for improving your networking skills. So you can create virtual network environments on your PC and start simulating Cisco devices!
How to Install Packet Tracer on Windows 11 or 10 64-Bit
Cisco Packet Tracer allows you to create a network in a virtual environment by simulating real Cisco network devices, firewalls, personal computers, and other devices. Using this software, you can prepare for exams offered by Cisco and improve your networking skills to stay one step ahead of others in the business world.
By using the simulation feature of Cisco software, you can examine step by step how computers on the same network or remote networks communicate over IP addresses. Another example is that, because corporate networks must have a redundant structure, you can gain experience by creating physical networks in virtual environments.
The Packet Tracer simulation program is compatible with Windows, Linux, and macOS operating systems, but older versions may not support new distributions. That’s why you need to check the system requirements when you need to install a more recent version.
How to Download and Install Packet Tracer
Before proceeding with the installation steps, you must download Packet Tracer for your Windows computer. Instead of downloading directly, you can download it from the Netacad website by following the steps below.
Step 1
You can download PT from the direct download links we have published on our website, or you can do this through the NetAcad website. Click Login to log in to your Netacad account.
Step 1
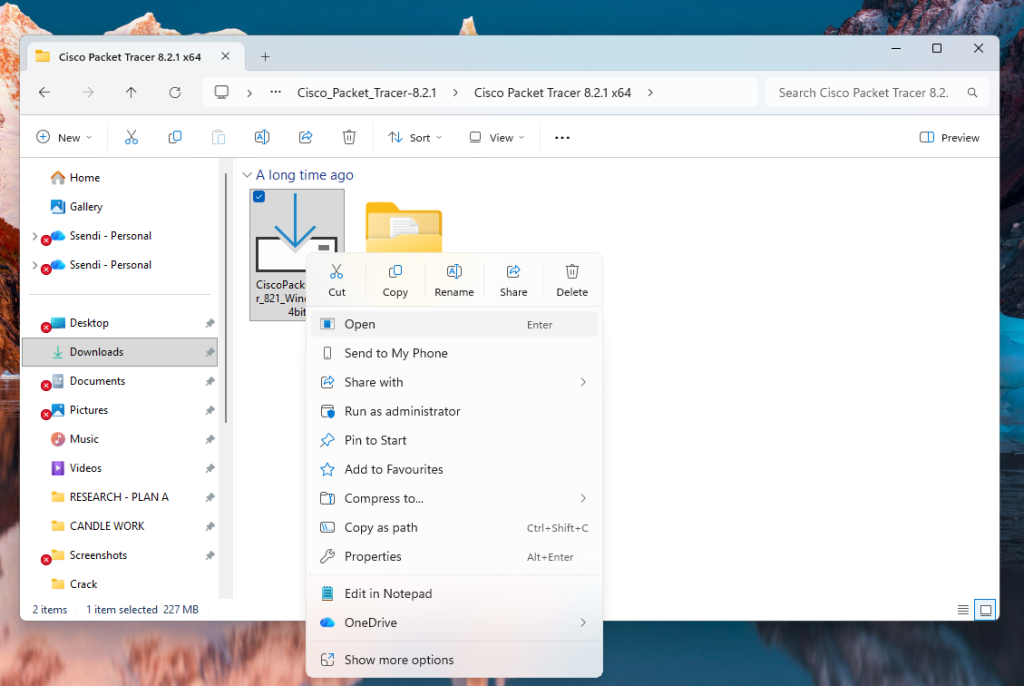
After downloading you extract the folder and run the execution file. Right-click on the Packet Tracer.exe setup file you downloaded to your computer and click the Run as Administrator option from the options that appear. Then click Run to confirm that you are running the setup file on your system.
Step 5
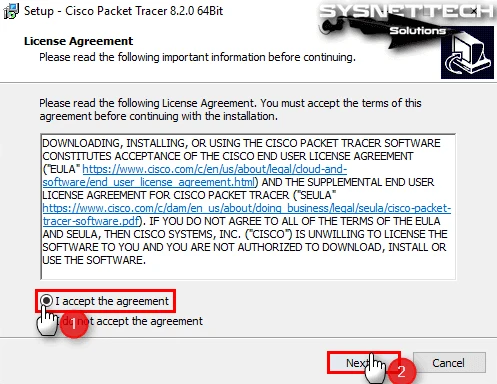
In the Packet Tracer license agreement window, please select the I accept the agreement option to confirm the rules and click the Next button.
Step 3
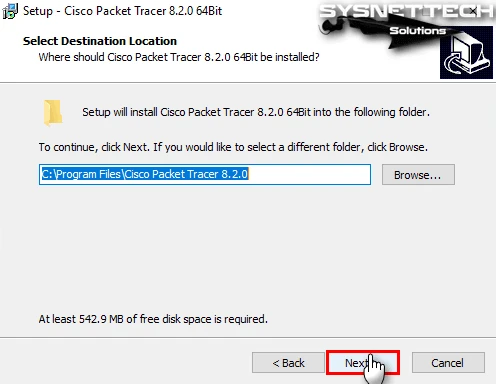
If you want to change the location you wish to install in the Select Destination Location window, you can click the Browse button to select a different location.
Click Next directly to choose to install in the default location in the Wizard.
Step 4
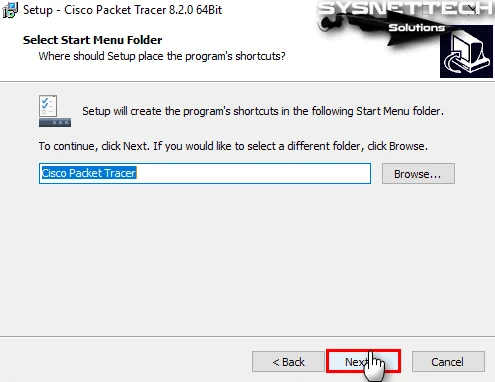
In the Select Start Menu Folder window, as the name suggests, you can change the name of the folder for the start menu after installation. Leave the default option here and continue with the installation.
Step 5
In the Select Additional Tasks window, you can create a desktop shortcut and a quick launch shortcut for Packet Tracer on your computer. You can continue this step by simply creating a desktop shortcut.

Step 6
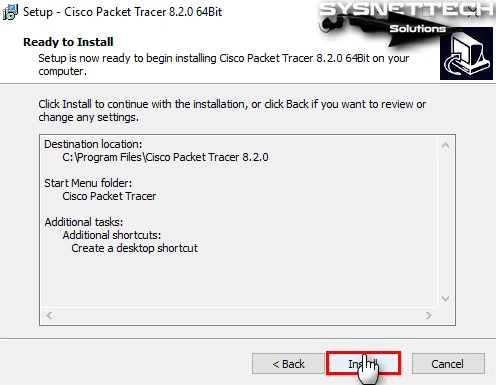
In the Ready to Install window, you can review the configurations required to install Packet Tracer from the image below. If you want to make a change, you can go back to the previous steps.
Click the Install button to start copying the files directly.
Step 7
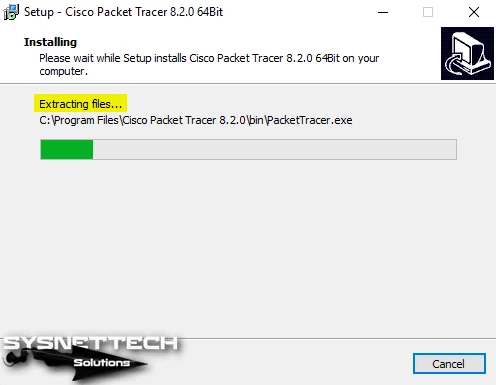
Wait while the necessary files for Packet Tracer 64-bit are copied to your system. This process will be completed in a few minutes.
Step 8
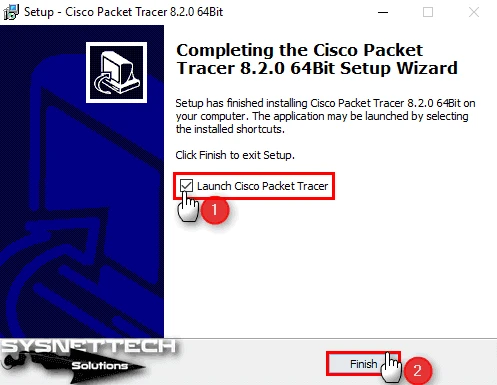
After completing the Cisco Packet Tracer Setup Wizard, make sure you uncheck the Launch Cisco Packet Tracer option. DO NOT click finish if it is selected. If you accidentally run the software, just close it.
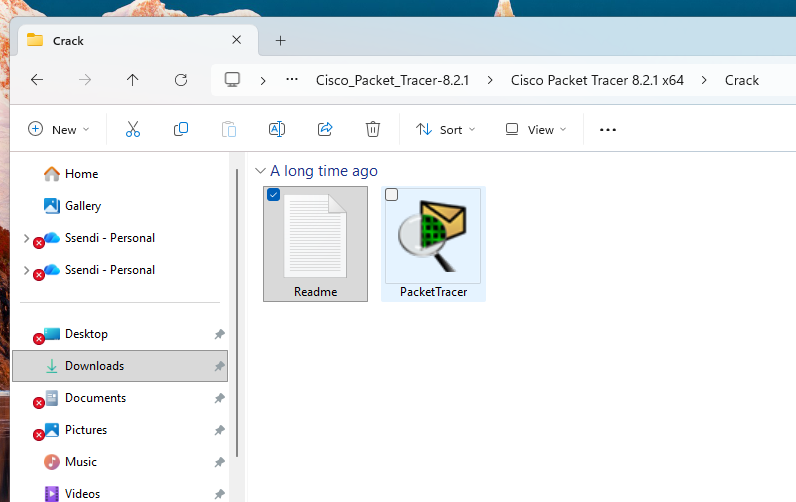
Step 8
Copy cracked file to “C:\Program Files\Cisco Packet Tracer 8.1.1\bin\”
Just close the login window
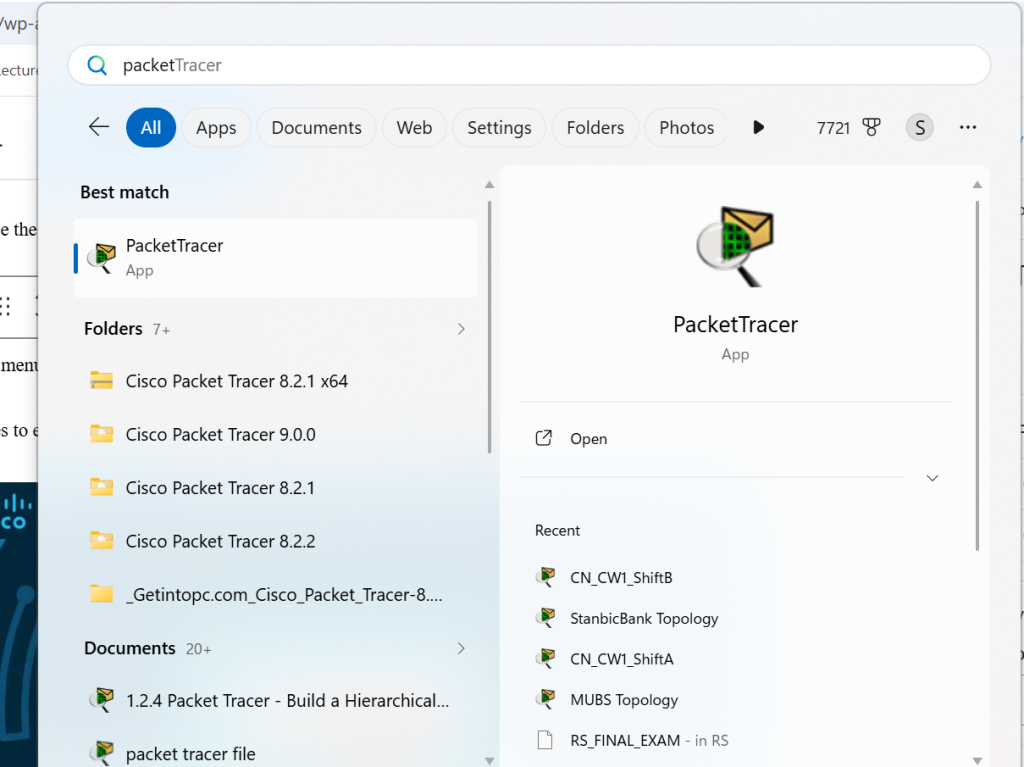
Step 9
Go to the start menu and launch the software.
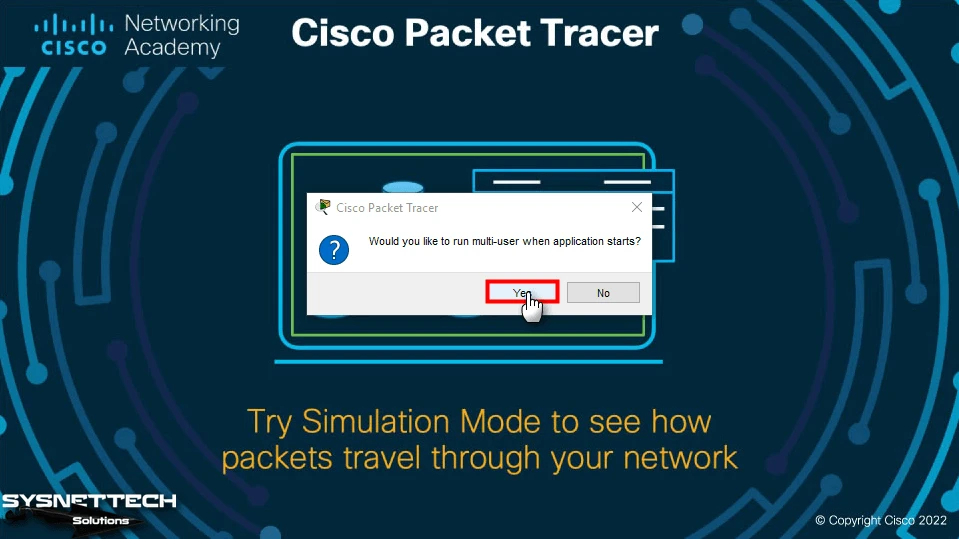
Click Yes to enable the multi-user function each time the Cisco network simulator is opened.
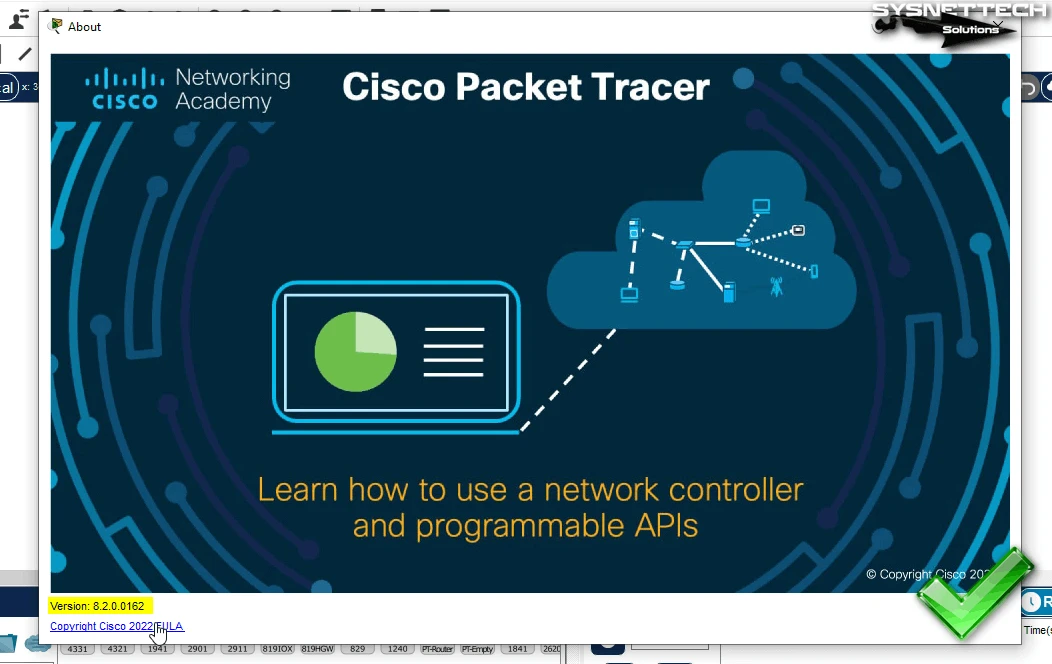
Step 15
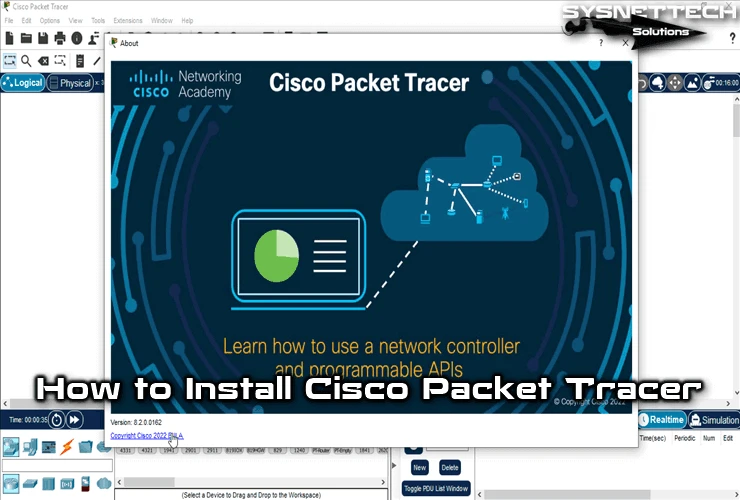
The workspace environment of the new version of Packet Tracer after installation is as shown in the image below. You can reach this window by clicking Help / About to check the version.
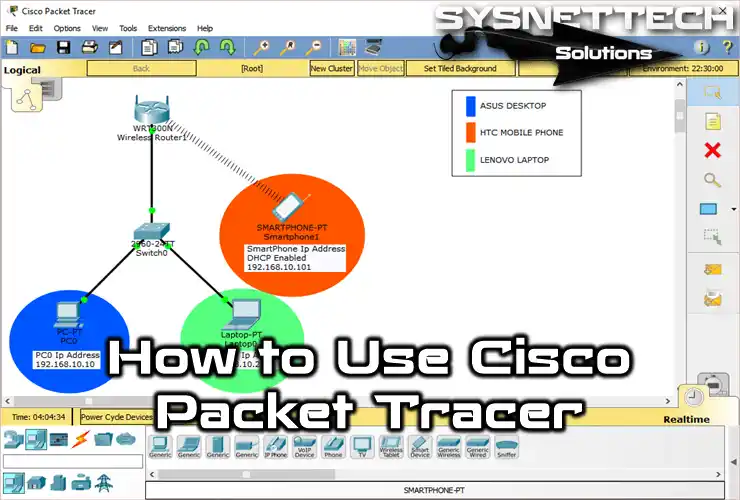
How to Create a New Project
After installing the Cisco Packet Tracer on Windows 11 or 10, you can start creating a new topology by dragging and dropping devices such as computers, routers, switches, or security devices to the workspace.
If you’re new to this software, you might want to check out a guide on how to use Cisco Packet Tracer for more detailed instructions and tips.
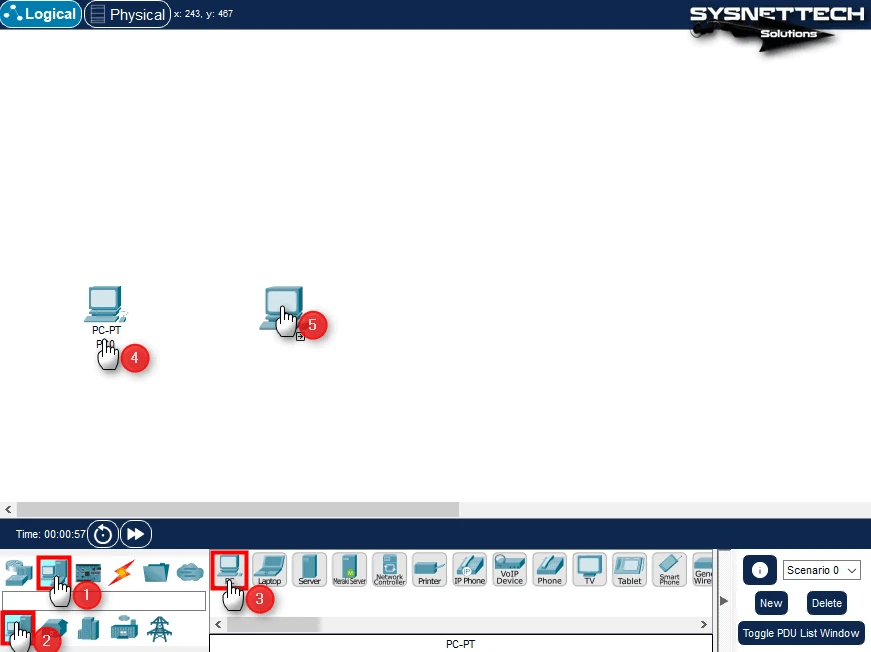
Step 1
After clicking the computer icon from the End Devices panel, add two PCs to the workspace from the list containing end-user devices.
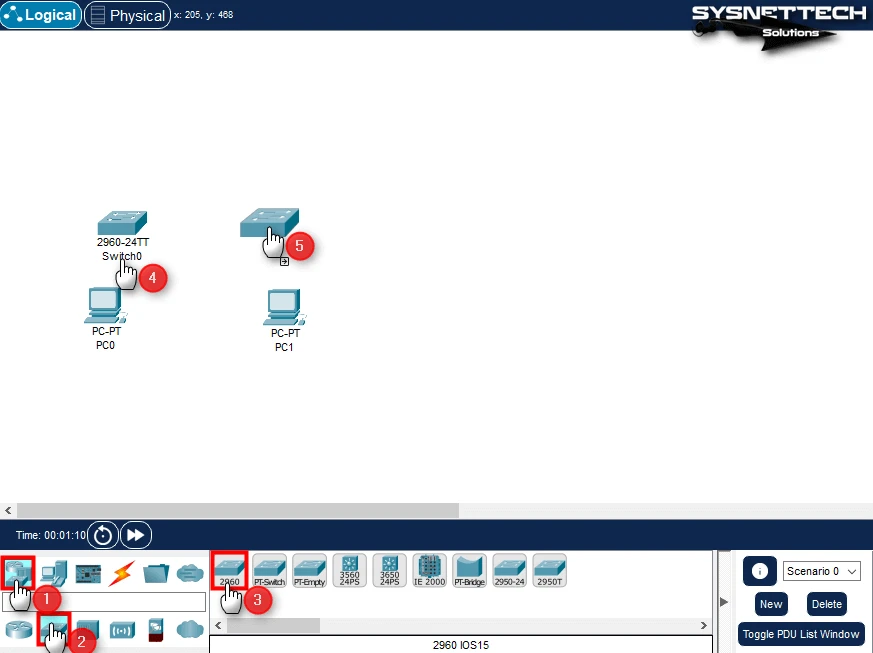
Step 2
Activate the Switch group from the network devices category, and then add two 2960 model Cisco Switches to the workspace.
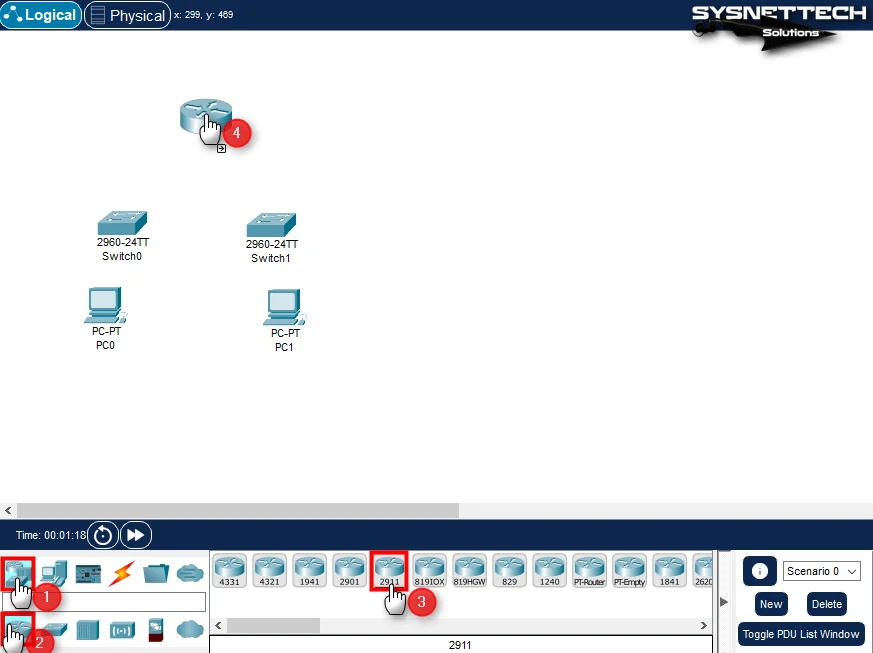
Step 3
In the same way, a 2911 model Cisco Router from the network devices category should be added to the workspace.
Step 4
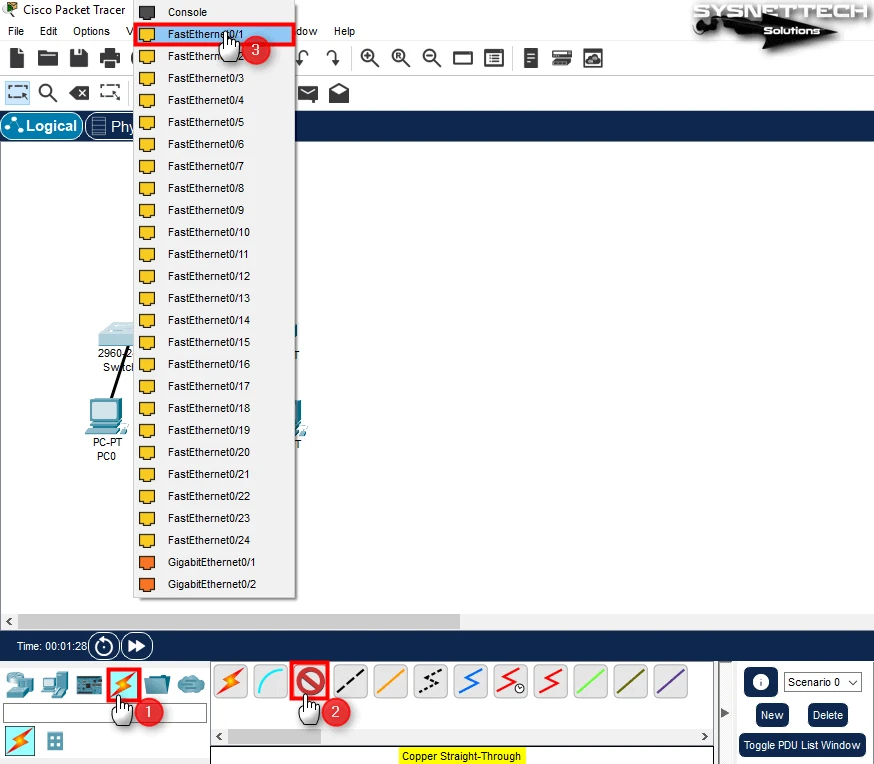
Select the Copper Straight-Through cable type from the cabling category, connect one end of the cable to the Ethernet interface of PC0, and then connect the other end to the FastEthernet 0/1 interface of the Switch.
Step 5
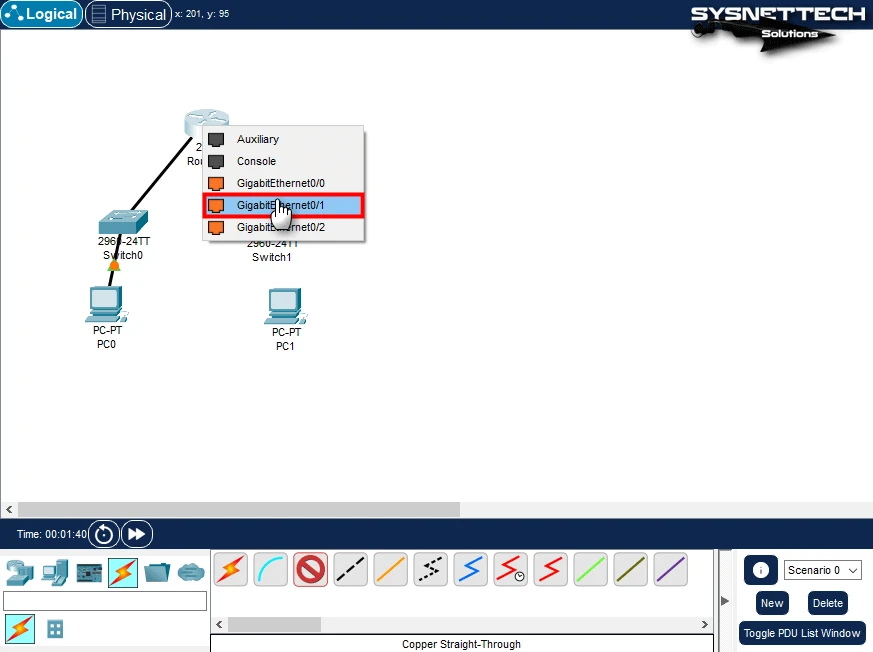
Since the network connection between the Switch and the Router must be fast, connect one end of the cable to the GigabitEthernet 0/1 interface of the Switch and the other end to the GigabitEthernet 0/1 interface of the Router.
Step 6
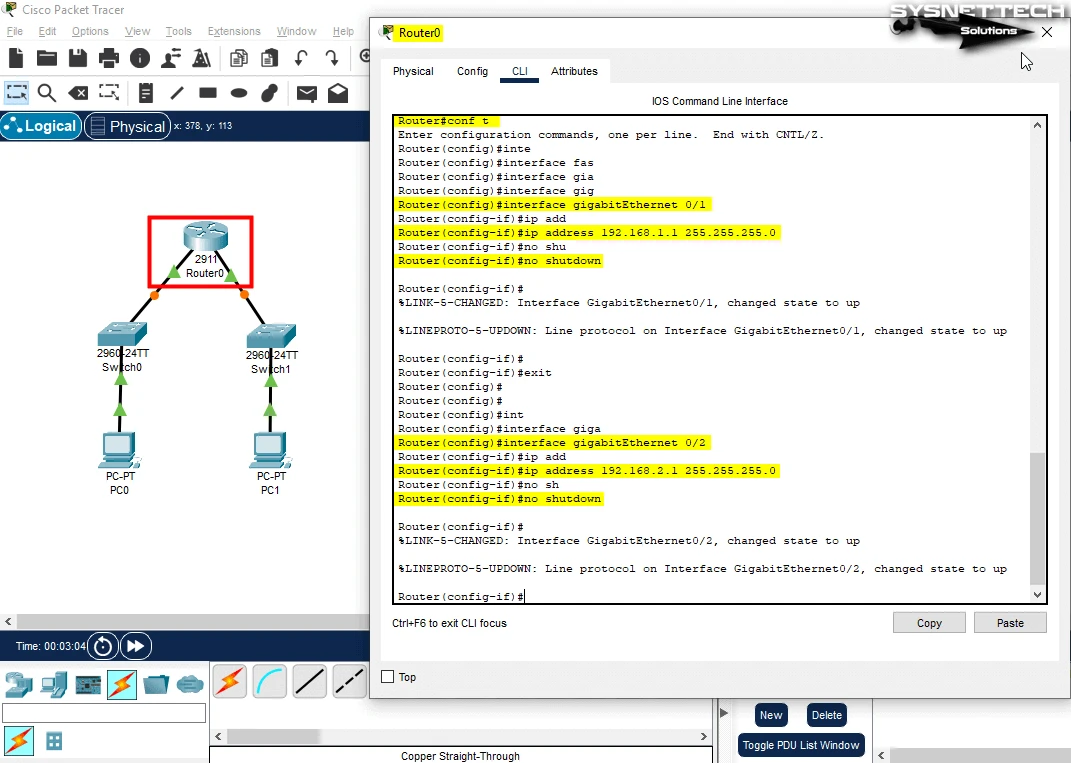
Likewise, wire the Switches and PCs connected to the other GigabitEthernet interface of the Router, as in the image below. Then, execute the commands below in the CLI command prompt to assign IP addresses to the Router’s interfaces and activate the ports.
Router# conft
Router(config)# interface gigabitEthernet 0/1
Router(config-if)# ip address 192.168.1.1 255.255.255.0
Router(config-if)# no shutdown
Router(config-if)# exit
Router(config)# interface gigabitEthernet 0/2
Router(config-if)# ip address 192.168.2.1 255.255.255.0
Router(config-if)# no shutdownCopy
Step 7
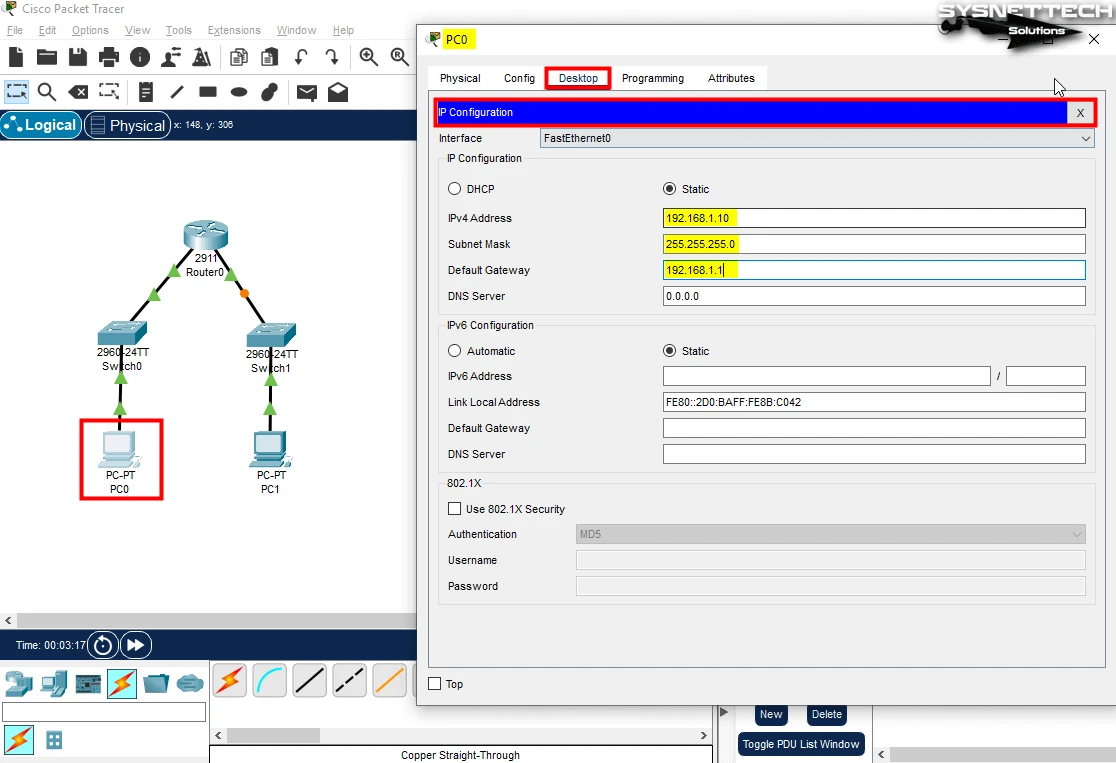
To assign static IP addresses to PCs on the network, you must use the IP Configuration interface on the Desktop tab. After clicking on PC0, click on IP Configuration in the panel that opens, and assign the IP address 192.168.1.10.
IPv4 Address: 192.168.1.10
Subnet Mask: 255.255.255.0
Default Gateway: 192.168.1.1Copy
Step 8
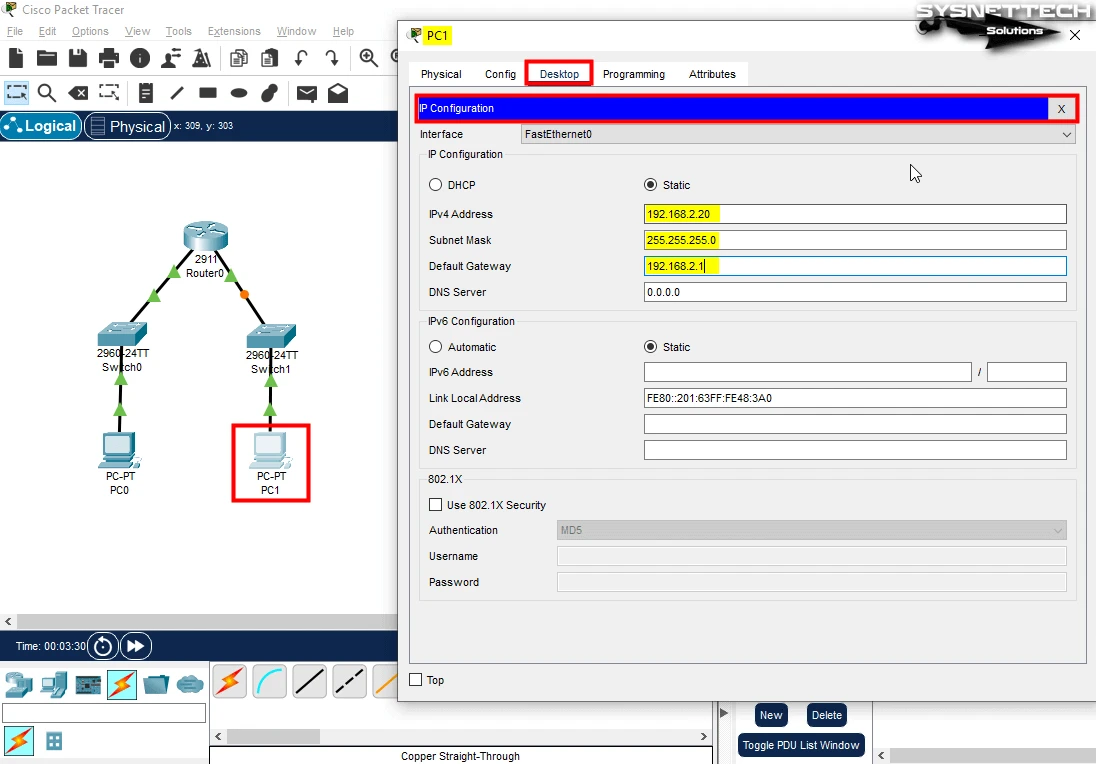
Since PC1 is in the network connected to the other interface of the Router, you need to assign an address from the IP block 192.168.2.0/24.
IPv4 Address: 192.168.2.20
Subnet Mask: 255.255.255.0
Default Gateway: 192.168.2.1Copy
Step 9
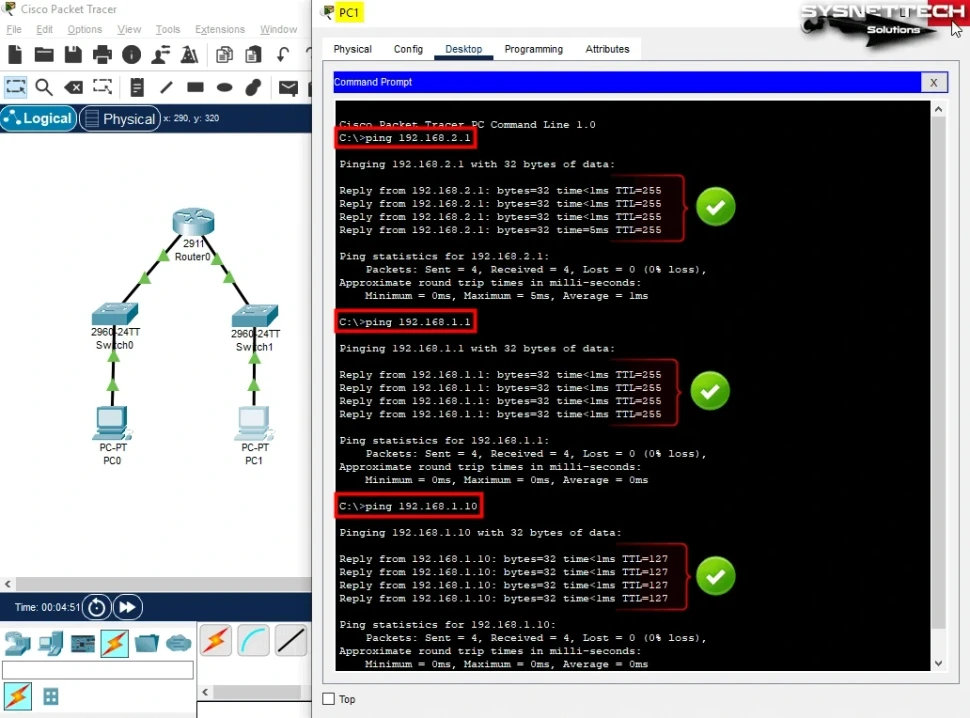
After making the necessary settings, use the PC0’s Command Prompt tool to ping the Router’s GigabitEthernet0/1 and GigabitEthernet0/2 interfaces as well as PC1 on the other network and test the network connection.

Step 10
Likewise, ping the Router’s GigabitEthernet 0/2 interface on the 192.168.2.0/24 network to which PC1 is connected and test the network connection. If you can access the interface to which it is connected, you will also be able to ping the 192.168.1.0/24 network, as the main task of the Router is to separate the networks.
How to Uninstall Packet Tracer from Windows 11 or 10
You can easily do this from your Windows system when new versions of Packet Tracer are released, or you want to uninstall them for some reason.
Steps:
Step 1
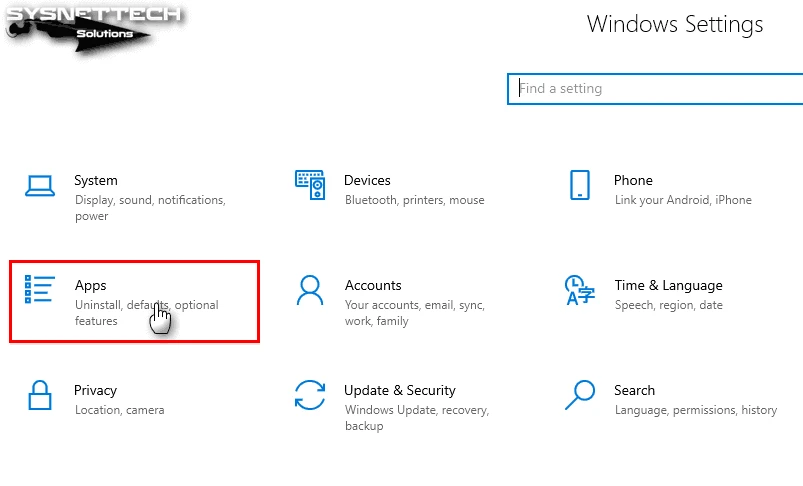
To remove the Cisco software you have installed from your system, click Start Menu, Settings, and then Apps.
Step 2
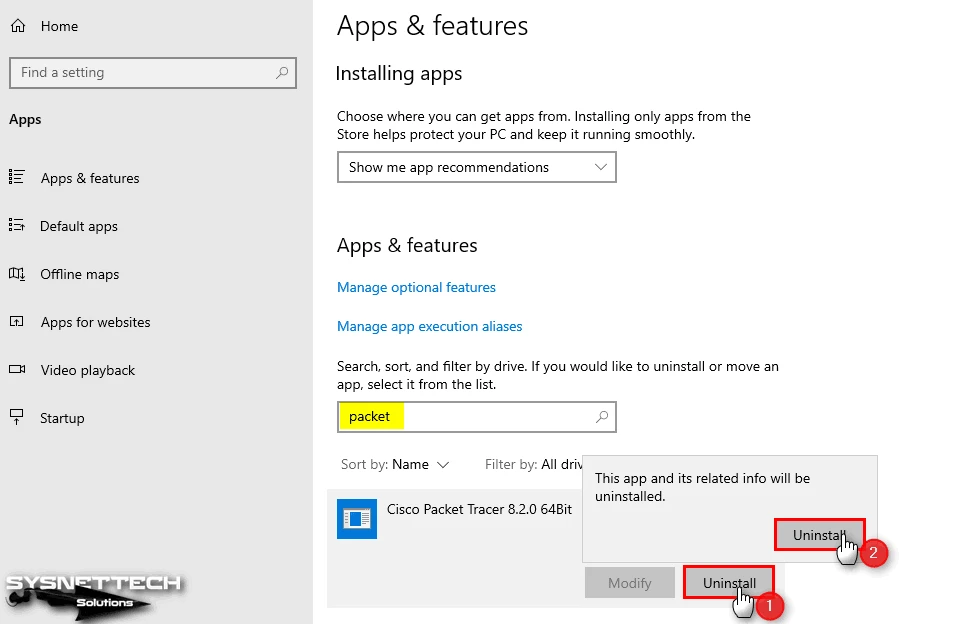
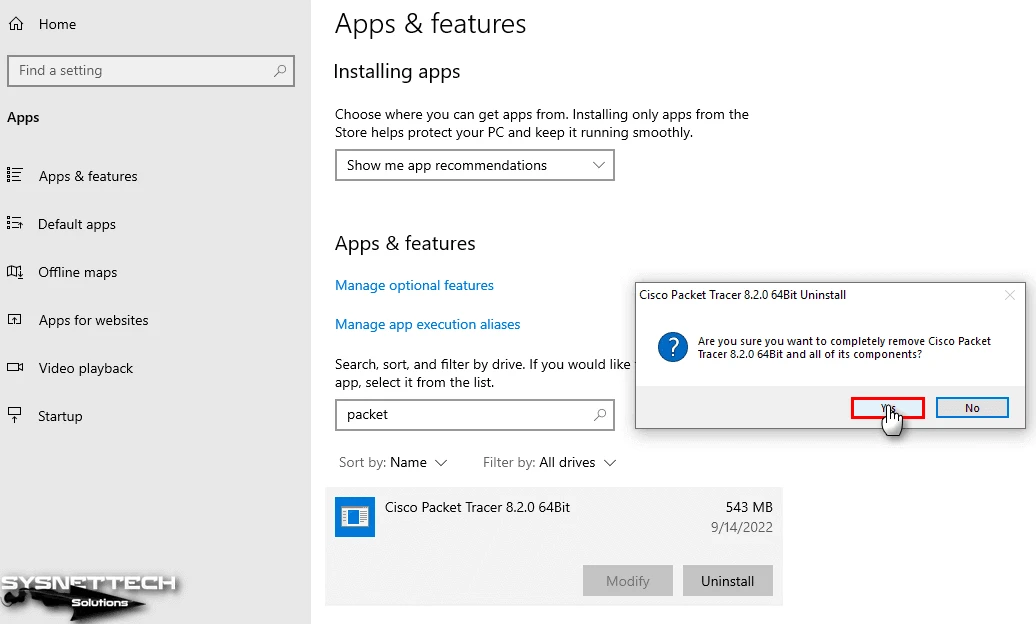
After opening Apps & Features, type the name of the program you want to uninstall, as in the image below, and click the Uninstall button.
Step 3
Click Yes in the pop-up window to confirm the complete deletion of Packet Tracer and its components.
Step 4
After completely removing the Cisco Packet Tracer from your system, click OK in the information window and finish the process.

Conclusion
In conclusion, Cisco Packet Tracer version 8.2 is an essential tool. It is valuable for both Cisco Networking students and professionals.
This software can simulate real-world network scenarios. Thus, you can improve your professional networking skills. In addition, you will get a great hands-on learning experience to prepare for Cisco exams.
Also, you can easily set it up with the screenshots I have added to this article. After that, you can benefit from the functionality of Packet Tracer. In this way, you can understand networking better and create virtual environments. In addition, this simulator software helps you to stay up-to-date in the dynamic networking field.